Configure Generic SAML Integration
Ensure that you have Administrator access to your SAML Account and Trust3 AI.
Follow these steps to set up SAML-based Single Sign-On (SSO) with any Identity Provider (IdP) supporting SAML 2.0.
Step 1: Configure Identity Provider Details
- Enter below details in your Identity SAML settings:
| Field | Value Example |
|---|---|
| Identity Provider URL | https://na.trust3ai.com/SingleSignOnService/receiveResponse |
| Audience URI (SP Entity ID) | trust3ai_portal |
Step 2: Map User Attributes
In the Attribute Statements section, map user attributes as follows:
| Name | Value | Optional/Required |
|---|---|---|
UserId | userName | Required |
Email | email | Required |
FirstName | firstName | Optional |
LastName | lastName | Optional |
Step 3: Optional - Configure Group Attribute
In the Group Attribute Statements, map group attributes as follows:
| Name | Filter Value | Example Description |
|---|---|---|
Group | group_name | Matches only the group group_name |
Step 4: Obtain Identity Provider Metadata and Embed Link
- Obtain the Identity Provider Metadata URL and download the Metadata XML file from your Identity Provider.
- Use this metadata to configure the SSO settings in your Trust3 AI portal.
By following these generic steps, you can seamlessly integrate any Identity Provider (e.g., Okta, Ping Identity, OneLogin) that supports the SAML 2.0 protocol.
Configure SAML in your Trust3 AI account
In Trust3 AI, follow these steps to configure a Generic SAML-based Single Sign-On (SSO):
- Go to the Settings menu.
- Navigate to Identity.
- Enable Single Sign-On.
| Display Name | Description | Example Value | Optional/Required |
|---|---|---|---|
Entity Id | Entity ID for SAML configuration | trust3ai_portal | Required |
Identity Provider Url | Identity Provider (IdP) URL for SSO login | https://your-idp-domain/sso/saml | Required |
Identity Provider Metadata | Metadata XML file for the IdP | https://your-idp-domain/metadata.xml | Required |
UserName Attribute | Attribute representing the user's username | UserId | Required |
Email Attribute | Attribute representing the user's email | Email | Required |
FirstName Attribute | Attribute representing the user's first name | FirstName | Optional |
LastName Attribute | Attribute representing the user's last name | LastName | Optional |
Username Conversion in SSO
This setting determines how usernames are generated during SSO login when the Username Attribute value contains an email address.
Username Format Options
-
When the toggle is ON: The system uses the email prefix (the part before @) as the username. Example:
jane.doe@xyz.com→jane.doe -
When the toggle is OFF: The system uses the full email address as the username. Example:
jane.doe@xyz.com→jane.doe@xyz.com
Important Considerations
Possible Conflict: Email Already in Use
A conflict may occur if the email address is already associated with another user in the system. This may prevent successful login or account linking during SSO authentication.
Example Scenario: When a user attempts to log in with email jane.doe@xyz.com, but this email is already associated with username jane.doe, the login will fail due to the conflict.
Resolution Steps: An administrator must delete the existing user from Settings → Users, then ask the user to sign in via SSO again.
Configuration Impact
- New SSO logins will use the configured username format
- Existing users will be affected by this change on their next login attempt.
Troubleshooting
If you experience issues with SSO login, refer to the SSO Login Troubleshooting Guide for detailed steps and solutions.
Important
- Entity ID: Used to configure the Identity Provider (IdP).
- Identity Provider URL: The URL obtained in Step 4, where users will be redirected for SSO login.
- Identity Provider Metadata: Use the Metadata XML file downloaded in Step 4 for seamless SSO configuration.
- User Attributes: Ensure that the correct user attributes (
UserId,Email,FirstName,LastName) are mapped from Generic SAML to Trust3 AI.
These variables ensure seamless integration between Generic SAML and Trust3 AI for SAML-SSO.
Role Mapping For Generic SAML
Role mapping allows you to translate roles or groups from your SAML Identity Provider (IdP) into specific roles within Trust3 AI. This ensures that users have the correct permissions and access when they log into Trust3 AI.
What is Role Name Attributes?
This attribute in your Identity Provider (IdP) contains the user's roles or group information. It is used to identify the roles or groups the user belongs to in the IdP.
What is Role Mapping?
This configuration maps roles or groups from the Identity Provider (IdP) to corresponding roles in Trust3 AI. If a specific role from the Identity Provider (IdP) matches a role defined in the role mapping configuration, that role is assigned to the user in Trust3 AI. If no mapping is defined, the default role, ROLE_USER, is automatically assigned to the user.
| Variable Name | Description | Example |
|---|---|---|
Role Name Attribute | Role name attributes for user. | Group |
Role Mapping | Role mapping for user. | Identity Provider (IdP) Role: example_role → Example Role: ACCOUNT_ROLE |
Reference image of Role Mapping from Trust3 AI: 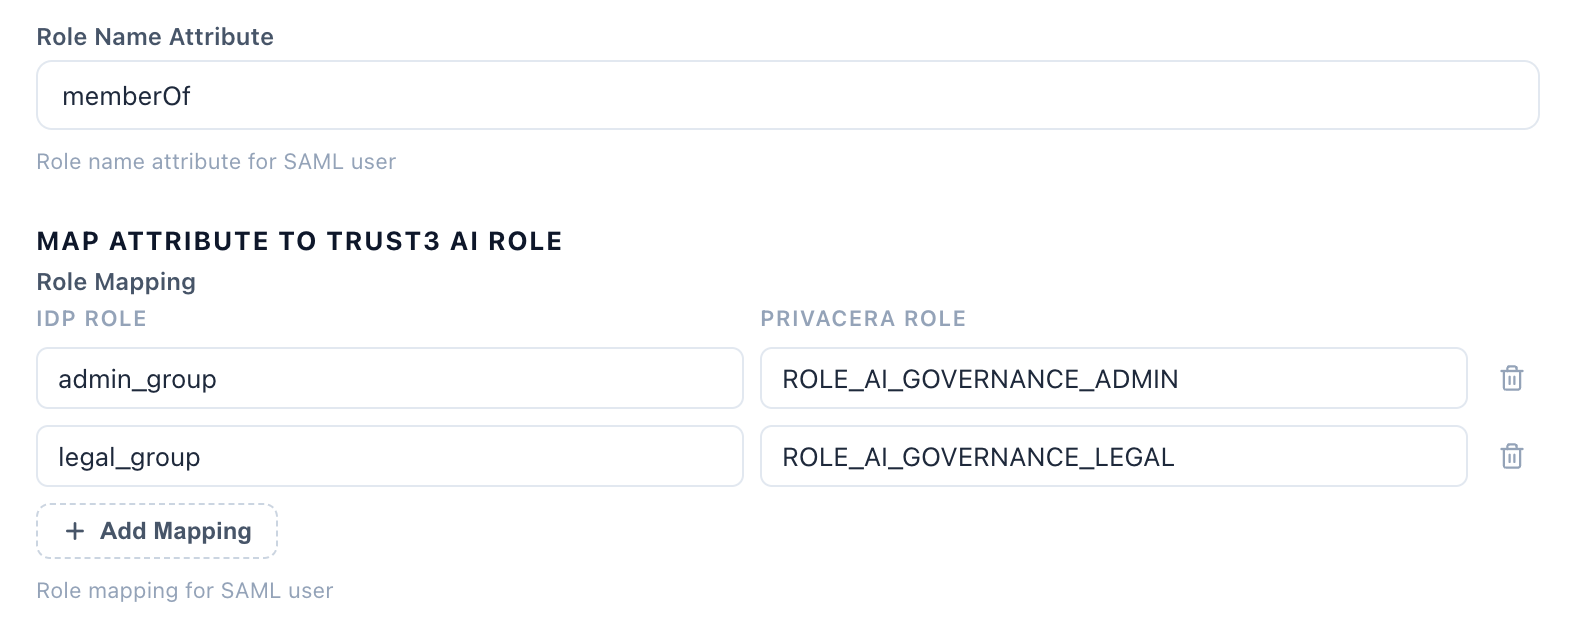
Example:
- IdP Role or Group:
example_role - Mapped Trust3 AI Role:
ACCOUNT_ADMIN
In this example, if a user has the role example_role in Generic SAML, they will automatically be assigned the ACCOUNT_ADMIN role in Trust3 AI.
Important
New Users:
Role mapping only applies to newly created users after the mapping has been configured.
By properly configuring role mapping, you ensure that users are granted appropriate access levels within Trust3 AI based on their roles or group memberships from the Identity Provider (IdP). This simplifies user management and ensures seamless integration with your organization’s existing identity infrastructure.
Once the configuration is complete, you can test the setup by attempting to log in to the Trust3 AI portal using your SSO credentials. This will help verify that the Single Sign-On (SSO) integration is working correctly.